ezyLiv App for Mac, MacBook Pro/Air - Free Download
In the era of advanced technology, security has become a top priority for homeowners, business owners, and anyone concerned about personal safety. Surveillance cameras offer an effective way to keep an eye on properties, whether it’s your home, office, or any other area you wish to monitor. To enhance your surveillance experience, the ezyLiv app allows you to manage and monitor your security cameras remotely with ease. This powerful app is available on Android and iOS, but in this guide, we will focus on how to download and use the ezyLiv app on your Mac.
If you're looking for a way to access your cameras on a larger screen, monitor real-time video feeds, or configure your system remotely from your Mac device, ezyLiv makes this process seamless. Let’s dive into the details of how to download, install, and use the ezyLiv app on your Mac device.
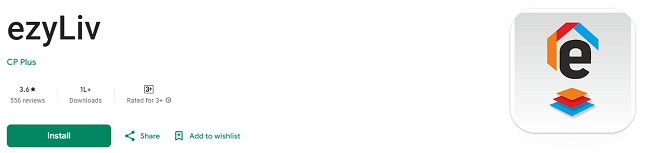
What is the ezyLiv App?
Before we explore how to use the ezyLiv app on your Mac, it’s important to understand what this app offers and why it is a great solution for managing your security cameras.
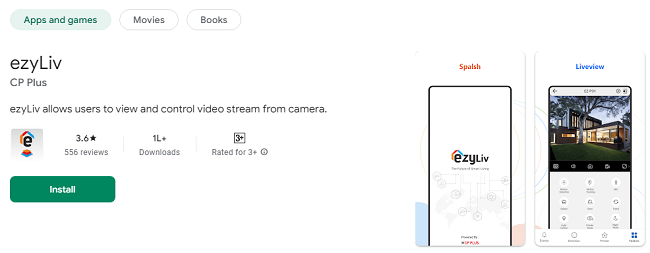
The ezyLiv app is a comprehensive and user-friendly surveillance management tool that allows you to control and monitor your security cameras remotely. This app supports a wide variety of security cameras and provides features like live streaming, push notifications, PTZ (Pan, Tilt, Zoom) control, two-way communication, and more. The ezyLiv app is typically used on smartphones and tablets, but with the help of an Android emulator, it can be used on your Mac as well.
Why Use ezyLiv on Your Mac?
Using the ezyLiv app on your Mac device comes with several advantages:
Larger Screen: Monitor multiple cameras at once on a bigger screen, giving you a clear view of each area.
Better Control: The app on a Mac provides enhanced controls for managing your surveillance system.
Convenience: You can monitor live feeds, adjust camera settings, and receive notifications without having to rely on your mobile device.
Access on Multiple Devices: You can easily switch between your mobile and Mac devices for flexible monitoring.
Steps to Download ezyLiv App on Your Mac
Since the ezyLiv app is not natively available for Mac (as it’s designed for mobile operating systems), you’ll need to use an Android emulator to run the app on your Mac. An emulator is software that mimics an Android device on your computer, allowing you to download and use Android apps like ezyLiv on your Mac.
Let’s go through the steps required to download and use ezyLiv on your Mac.
Step 1: Download an Android Emulator
The first step is to download an Android emulator. Two of the most popular Android emulators are:
BlueStacks: One of the most popular and trusted Android emulators for macOS.
NoxPlayer: Another great emulator for running Android apps on Mac devices.
You can download either of these emulators from their official websites.
To download BlueStacks:
Visit BlueStacks' official website.
Click on the "Download BlueStacks" button for Mac.
Once the file is downloaded, open the installer and follow the on-screen instructions to complete the installation process.
After installation, launch BlueStacks on your Mac.
To download NoxPlayer:
Visit NoxPlayer's official website.
Click on the "Download" button for macOS.
Open the downloaded file and follow the instructions to install NoxPlayer on your Mac.
Once the installation is complete, open the NoxPlayer emulator.
Step 2: Install ezyLiv App via the Emulator
Once the Android emulator is installed, you can easily download the ezyLiv app from the Google Play Store.
Open the Android Emulator: Launch BlueStacks or NoxPlayer on your Mac.
Sign in to Google Play Store: When the emulator starts, you’ll be prompted to sign in with your Google account (if you haven’t already). Enter your credentials to access the Play Store.
Search for ezyLiv: Once you’re logged into the Play Store, search for ezyLiv in the search bar.
Download & Install ezyLiv: Click on the ezyLiv app in the search results, then click the “Install” button. The app will be automatically downloaded and installed onto the emulator.
Launch the ezyLiv App: Once installed, you can find the ezyLiv app in the emulator's app drawer. Open the app, and you’re ready to get started with your security camera monitoring.
How to Use ezyLiv on Your Mac?
Now that you’ve successfully installed the ezyLiv app on your Mac, it’s time to learn how to set up and use it. The ezyLiv app offers a wide range of features that make monitoring your security cameras easy and effective.
Step 1: Create an Account or Sign In
To use the ezyLiv app, you’ll need to either create a new account or sign in with your existing credentials. Follow these steps:
Open ezyLiv: Launch the ezyLiv app from the emulator on your Mac.
Create an Account: If you’re a new user, click on the “Sign Up” option and enter the required details (name, email, password) to create a new account.
Sign In: If you already have an ezyLiv account, simply log in using your username and password.
Step 2: Add Your Camera Devices
Once you’re logged into the ezyLiv app, you need to connect your security cameras to the app. The ezyLiv app offers two primary methods for adding devices:
Using QR Code (Fast Setup): If your camera supports QR code scanning, this is the easiest way to add your camera to the app.
In the ezyLiv app, go to the Device Management section.
Click on Add Device and select Scan QR Code.
Scan the QR code provided with your camera using your Mac’s camera (via the emulator).
The app will automatically recognize your camera and add it to your device list.
Manual Device Setup: If your camera doesn’t have a QR code, you can add it manually.
Tap on Add Device in the app.
Select your camera type and enter the camera’s IP address or device ID.
Follow the instructions to connect your camera to your Wi-Fi network.
Step 3: Monitor Live Feeds
Once your cameras are connected, you can start monitoring live video feeds right from the ezyLiv app on your Mac. Here’s how:
Go to the Device List: In the ezyLiv app, tap on the Device List to view all the connected cameras.
Select a Camera: Click on the camera you want to monitor. The live video feed will begin streaming on your screen.
Full-Screen View: If you want to view the live feed in full-screen mode, click the full-screen icon (usually located at the top of the stream window).
Multiple Cameras: If you have multiple cameras, you can switch between feeds by tapping on each device. Some emulators also support viewing multiple camera streams at once.
Step 4: Control PTZ Cameras Remotely
If your camera supports PTZ (Pan, Tilt, Zoom), the ezyLiv app allows you to control its movement remotely. Here’s how to use this feature:
View Live Feed: Start viewing the live feed from a PTZ-enabled camera.
PTZ Control: Tap the PTZ Control button to access the camera’s movement controls.
Pan & Tilt: Use the on-screen arrows to pan and tilt the camera in different directions.
Zoom In/Out: Adjust the zoom level using the zoom slider to focus on specific areas of interest.
Step 5: Enable Motion Detection Alerts
One of the key features of ezyLiv is its motion detection functionality. You can set up alerts to be notified whenever your cameras detect movement. Here’s how:
Select Your Camera: In the ezyLiv app, tap on the camera you wish to configure.
Access Settings: Go to Camera Settings and select Motion Detection.
Enable Motion Detection: Turn on motion detection and adjust the sensitivity to suit your needs.
Customize Alerts: Choose how you want to receive notifications (push notifications, email alerts, etc.).
Additional Features of ezyLiv on Your Mac
Here are some more advanced features of the ezyLiv app that you can enjoy while using it on your Mac:
Two-Way Audio: If your camera supports two-way audio, you can communicate with anyone near the camera through the ezyLiv app.
Health Monitoring: You can check the health of your devices, ensuring they are online and functioning properly.
Cloud Storage: Save important footage to the cloud for easy access and playback anytime you need it.
Remote Configuration: Adjust settings like video quality, motion detection, and PTZ control remotely.
Conclusion
The ezyLiv app is a powerful tool for managing and monitoring your security cameras, and using it on your Mac can greatly enhance your experience. With the help of an Android emulator like BlueStacks or NoxPlayer, you can download and install ezyLiv on your Mac in just a few simple steps. Once set up, you can enjoy a host of features such as live video streaming, PTZ control, motion detection alerts, two-way audio, and more.
By following the steps outlined in this guide, you’ll be able to set up and use the ezyLiv app on your Mac effortlessly. Enjoy enhanced security and peace of mind with the power of ezyLiv at your fingertips.
Trending Now
Updates