Login & Setup ezyLiv App for Real-Time Camera Monitoring
In an age where security is more important than ever, surveillance cameras have become essential for ensuring safety, whether it’s for your home, office, or other important spaces. However, managing and monitoring these cameras efficiently requires a reliable app. Enter ezyLiv — a user-friendly, powerful app that makes setting up and managing surveillance cameras easier than ever. Whether you’re a first-time user or an experienced tech enthusiast, this guide will walk you through the process of logging in and setting up the ezyLiv app to start monitoring your cameras.
In this article, we'll cover everything you need to know about logging into the ezyLiv app, adding your devices, setting them up, and how to make the most of all the features the app has to offer. Let’s dive in!
What is ezyLiv App?
Before jumping into the setup process, it’s important to understand the capabilities of the ezyLiv app.
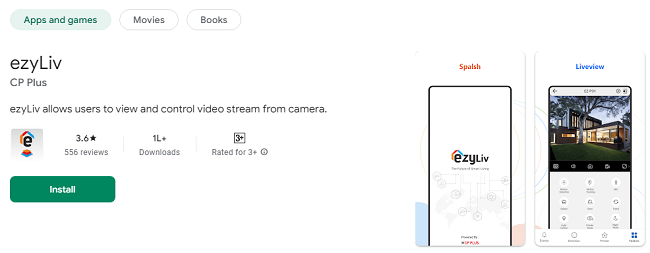
ezyLiv is a comprehensive mobile app designed for monitoring and managing surveillance cameras. It offers features like live streaming, push notifications, PTZ (Pan, Tilt, Zoom) controls, two-way audio, and device health monitoring. The app supports both Android and iOS devices and works with a wide range of compatible cameras, making it ideal for both home and business use.
With ezyLiv, you can:
Stream live video from your cameras in real-time
Receive motion detection alerts and push notifications
Control PTZ cameras remotely
Communicate via two-way audio
Monitor the health status of your devices
Set up custom camera configurations remotely
These powerful features make ezyLiv a great tool for anyone who wants to monitor their property remotely, whether they are at home or on the go.
How to Login & Setup ezyLiv App to Monitor Security Cameras?
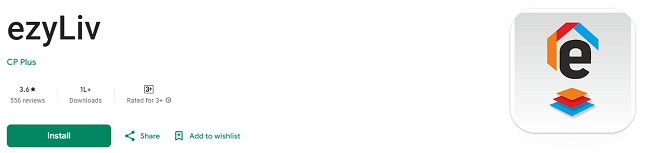
Step 1: Download the ezyLiv App
The first step in setting up your ezyLiv app is to download it to your smartphone or tablet. Follow the steps below to get started:
For Android Users:
Open Google Play Store: On your Android device, open the Google Play Store.
Search for ezyLiv: Type “ezyLiv” into the search bar.
Download the App: Find the ezyLiv app in the search results and click on the "Install" button. Wait for the app to finish downloading and installing.
Launch the App: Once the installation is complete, open the ezyLiv app from your home screen.
For iOS Users:
Open the App Store: On your iPhone or iPad, open the Apple App Store.
Search for ezyLiv: Type “ezyLiv” into the search bar.
Download the App: Tap on the "Get" button to download the ezyLiv app to your device.
Launch the App: After the app is installed, open it from your home screen.
Once installed, the next step is to log in to your ezyLiv account, or create a new one if you don’t have one already.
Step 2: Log In to the ezyLiv App
Logging into the ezyLiv app is a simple process, and it’s essential for managing and monitoring your cameras. Here’s how to do it:
Open the ezyLiv App: Launch the app from your home screen.
Sign In: On the main screen of the app, you’ll see options to either sign in or create a new account.
For Existing Users: Tap on the "Sign In" button. Enter your registered email address and password. Then, click "Login" to access your account.
For New Users: If you don’t have an account yet, tap on the “Sign Up” button. You’ll be asked to provide an email address and create a password. You may also need to verify your email address by following a link sent to your inbox.
Access Your Dashboard: After successfully logging in, you’ll be taken to the main dashboard where you can manage all of your connected devices.
Once logged in, it’s time to add your devices and start setting them up for monitoring.
Step 3: Add Your Camera Devices to the ezyLiv App
Now that you’re logged into the ezyLiv app, you need to connect your surveillance cameras so you can monitor them in real-time. ezyLiv supports two main methods for adding devices: QR code scanning and manual setup.
Method 1: Add Device Using QR Code (Fast and Easy)
Many modern security cameras come with a QR code that can be scanned for easy and fast setup. This is one of the quickest ways to add a camera to the ezyLiv app.
Go to the Device Management Section: In the app, tap on the “Device Management” or "Add Device" button.
Select QR Code Setup: Choose the option to add a device via QR code.
Scan the QR Code: Use your phone’s camera to scan the QR code found on your camera or its manual.
Name Your Device: Once the camera is detected, you may be prompted to name it (e.g., “Front Door Camera” or “Backyard Camera”). Choose a name that helps you easily identify the device.
Complete the Setup: Follow the on-screen instructions to complete the setup process. The app will automatically connect to your camera, and it should be added to your device list.
Method 2: Manual Device Setup
If your camera doesn’t support QR code scanning, you can add it manually using the camera’s IP address or device ID.
Go to Device Management: In the app, tap on “Add Device” or “Device Management.”
Select Manual Setup: Choose the option to manually add a device.
Enter Camera Details: You’ll be prompted to enter the camera’s IP address or device ID, which can be found in your camera’s manual or on the device itself.
Connect to Wi-Fi: The app will prompt you to connect your camera to your Wi-Fi network. Follow the instructions provided by the app to complete the process.
Finalize Setup: Once the camera is successfully connected, you’ll see it listed on the app’s device list.
After adding your cameras, you’ll be able to view live footage, adjust settings, and access all the other features that the ezyLiv app has to offer.
Step 4: Monitor Your Cameras
Once you’ve added your cameras to the ezyLiv app, you can begin monitoring them in real-time. Here’s how to do it:
View Live Video Feed
Go to Device List: Open the ezyLiv app and go to the device list to see all your connected cameras.
Select a Camera: Tap on the camera you wish to view. The live video feed will start streaming on your screen.
Maximize the View: If you want to view the footage in full screen, simply tap on the full-screen icon to expand the video feed for a better view.
Multiple Camera Views: If you have multiple cameras, you can easily switch between feeds by tapping on the corresponding camera in your device list.
Control PTZ Cameras Remotely
If your camera supports PTZ (Pan, Tilt, Zoom) functionality, you can adjust the camera’s position remotely via the ezyLiv app.
Start Viewing the Camera Feed: Open the camera’s live video feed.
Access PTZ Controls: Tap on the PTZ Control button.
Move the Camera: Use the on-screen buttons to move the camera left, right (pan), up, or down (tilt). You can also zoom in or out using the zoom slider.
This feature is especially useful for tracking movement or adjusting the camera’s field of view in real-time.
Step 5: Set Up Motion Detection and Alerts
ezyLiv comes with a built-in motion detection feature that allows you to receive alerts when your camera detects movement in its field of view. Setting up motion detection is easy and enhances the security monitoring experience.
Select Camera: In the ezyLiv app, tap on the camera for which you want to enable motion detection.
Access Camera Settings: Go to the Settings or Camera Settings menu.
Enable Motion Detection: Look for the “Motion Detection” option and toggle it on.
Adjust Sensitivity: Set the sensitivity level of the motion detection, and define specific areas (or zones) in the camera’s field of view where you want motion detection to be active.
Set Up Alerts: Choose how you would like to be notified (push notifications or email alerts) when motion is detected.
You can fine-tune the motion detection settings to suit your needs, ensuring that you only receive alerts when necessary.
Step 6: Customize Your Settings
ezyLiv also allows you to customize camera settings and app preferences to suit your needs. Here’s what you can do:
Video Quality: Adjust the video resolution for better quality or smoother streaming based on your network connection.
Sound Settings: Enable or disable audio for your live video feeds.
Two-Way Audio: If your camera supports two-way audio, enable it in the app to communicate with people near the camera.
Push Notifications: Customize the type of notifications you receive, including alerts for device disconnection, motion detection, and more.
Conclusion
Setting up and monitoring your cameras with the ezyLiv app is simple and efficient, whether you’re a tech-savvy user or a beginner. By following the steps outlined in this guide, you can quickly log in, add your devices, and begin monitoring your property in real-time. With features like live streaming, PTZ control, motion detection alerts, and two-way audio, ezyLiv makes managing your security cameras easier than ever.
Download the ezyLiv app today, and take control of your home or business security with just a few taps.
Trending Now
Updates