ezyLiv App for Windows 7/8/10/11 PC - Free Download
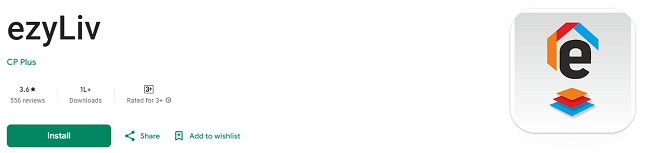
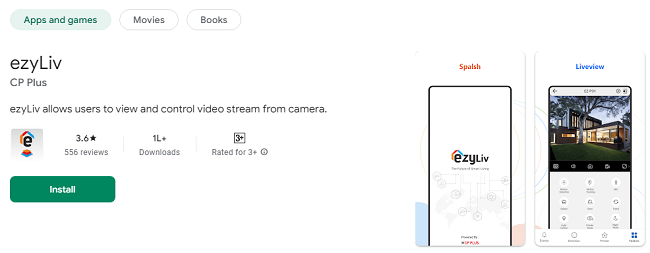
In today's world, remote monitoring and surveillance have become essential for both personal and professional needs. Whether you're keeping an eye on your home security system, managing surveillance cameras at a business, or simply monitoring a baby cam, the ability to view and control your devices remotely is a powerful tool. ezyLiv, a comprehensive mobile application for Android and iOS, provides users with the ability to monitor and manage devices remotely via video streaming.
While the ezyLiv app is primarily designed for mobile devices, there are times when you might want to access it from a larger screen. If you're a Windows PC user, you can easily download and use ezyLiv on your computer by using an Android emulator. This process enables you to use the ezyLiv app just as you would on your smartphone but with the convenience and better visibility of your PC screen.
In this guide, we will walk you through the steps to download, install, and use ezyLiv on your Windows PC, along with the benefits of using the app on a larger screen.
Why Use ezyLiv on Windows PC?
Before we dive into the details of how to install ezyLiv on your Windows PC, let’s first explore why you might want to use the app on a larger screen.
1. Enhanced Viewing Experience
Watching live video streams on your mobile phone is convenient but may not provide the best viewing experience, especially when you need to monitor multiple devices at once. Using ezyLiv on your Windows PC gives you a much larger screen to view the live footage, providing more detail and making it easier to spot any issues or events.
2. Better Control with Keyboard and Mouse
While the ezyLiv app on mobile devices offers touch controls, using it on a Windows PC with a mouse and keyboard can enhance the ease of navigating the app. This makes it simpler to pan and tilt cameras, change settings, or adjust other controls more precisely.
3. Multiple Device Monitoring
With a larger screen, you can view and manage multiple devices simultaneously, which can be especially useful for business surveillance or home security setups with several cameras. The increased real estate of a Windows PC screen makes it easier to track and switch between devices without straining your eyes.
4. Stability and Speed
Using ezyLiv on a Windows PC may offer more stability and better performance compared to running it on a mobile device. A desktop or laptop PC typically has more processing power, ensuring smoother video streaming and quicker responses.
Now that you understand why you might want to use ezyLiv on your Windows PC, let’s move on to the steps for downloading and setting up the app.
How to Download & Use ezyLiv App on Your Windows PC?
To use the ezyLiv app on your Windows PC, you'll need to run an Android emulator. An emulator mimics the Android operating system on your PC, allowing you to download and run Android apps like ezyLiv. Below are the detailed steps you need to follow to download and use ezyLiv on your Windows device.
Step 1: Install an Android Emulator on Your PC
The first step in running the ezyLiv app on your Windows PC is to install an Android emulator. There are several emulators available, but for this guide, we’ll use BlueStacks, one of the most popular and user-friendly Android emulators.
How to Install BlueStacks:
Visit the BlueStacks Website:
Go to the official BlueStacks website at www.bluestacks.com.
Download the BlueStacks Installer:
Click on the Download BlueStacks button to download the installer. The file will be in .exe format.
Install BlueStacks:
Open the downloaded .exe file and follow the on-screen instructions to install BlueStacks on your Windows PC.
You may need to allow permissions to make changes to your device.
Launch BlueStacks:
Once the installation is complete, click on the BlueStacks icon to open the emulator.
Step 2: Set Up BlueStacks and Access the Google Play Store
After launching BlueStacks, you’ll need to set it up before you can download and install ezyLiv. The setup process is similar to setting up a new Android phone.
How to Set Up BlueStacks:
Sign in with Google:
BlueStacks will prompt you to sign in with your Google account (just like you would on an Android device). Enter your credentials to proceed.
This step is necessary to access the Google Play Store, where you can download the ezyLiv app.
Customize Settings:
Once signed in, you can adjust any system settings within BlueStacks. For instance, you may want to increase the performance by adjusting the RAM and CPU usage settings if your PC has a higher specification.
Step 3: Download and Install the ezyLiv App
Now that BlueStacks is set up and you have access to the Google Play Store, you can easily download and install the ezyLiv app.
How to Download ezyLiv on BlueStacks:
Open the Google Play Store:
On the BlueStacks home screen, click on the Google Play Store icon to open the app store.
Search for ezyLiv:
In the Play Store, type "ezyLiv" in the search bar and press Enter. The ezyLiv app will appear in the search results.
Install the ezyLiv App:
Click on the Install button next to the ezyLiv app. BlueStacks will begin downloading and installing the app just like on a mobile device.
Launch ezyLiv:
Once the installation is complete, click the Open button, or you can find the ezyLiv icon on the BlueStacks home screen or app drawer.
Step 4: Set Up ezyLiv on Your Windows PC
Now that you’ve installed the ezyLiv app on your PC, it’s time to set it up and start using it to monitor and control your devices.
How to Set Up ezyLiv on BlueStacks:
Sign In or Create an Account:
Upon launching the ezyLiv app, you’ll be prompted to either sign in to your existing account or create a new one.
If you’re new to ezyLiv, you can sign up by providing your email address and creating a password.
Add Devices to ezyLiv:
To start monitoring, you need to add your devices. You can either scan a QR code provided by the device or enter its serial number or device ID manually.
If you have multiple devices, you can repeat this process to add all of them to the ezyLiv app.
Configure Device Settings:
After adding your devices, you can adjust their settings, such as video resolution, motion detection sensitivity, and more, directly from the ezyLiv app.
The app also allows you to configure notifications and control other device functions remotely.
Step 5: Start Monitoring and Controlling Devices
Once the ezyLiv app is set up, you can start using it to monitor your devices in real time and remotely control them.
Using ezyLiv on Your Windows PC:
View Live Video:
Tap on the device you want to monitor, and the live video feed will appear on the screen. You can maximize the feed for a larger view.
Control Devices:
Use PTZ (Pan, Tilt, Zoom) controls to adjust the view and focus on specific areas. You can also rotate or tilt the camera as needed.
Utilize the two-way audio feature to communicate with people near the camera if the device supports it.
Receive Alerts:
You’ll be notified of important events, such as motion detection or device disconnection, in real time through push notifications.
Manage Multiple Devices:
If you have multiple devices connected, you can easily switch between them to view different feeds simultaneously, all from the same screen.
Benefits of Using ezyLiv on Windows PC
1. Larger Screen for Better Viewing
The most significant advantage of using ezyLiv on a PC is the ability to monitor your devices on a larger screen. You can view high-definition video streams with more detail, making it easier to keep track of what’s happening around your devices.
2. Enhanced Control with Mouse and Keyboard
Controlling PTZ functions, adjusting settings, and switching between devices is easier and faster with the mouse and keyboard. The precision of the mouse makes camera control smoother compared to mobile touch screens.
3. Ideal for Multiple Device Monitoring
If you have a multi-camera setup, monitoring them all on a mobile phone can be cumbersome. On a Windows PC, you can view multiple live streams at once, making it much easier to keep tabs on various locations or devices simultaneously.
4. Better Performance and Stability
Your Windows PC might have more processing power and a stable internet connection than your mobile device, allowing for better performance, smoother video streaming, and fewer connectivity issues.
Conclusion
Using ezyLiv on your PC is a smart way to monitor and manage your devices with greater control, ease, and efficiency. By installing the ezyLiv app through an Android emulator like BlueStacks, you can enjoy all the features of ezyLiv, such as live video streaming, device management, PTZ control, and two-way communication, on a larger screen with the added precision of a mouse and keyboard.
The process of setting up the ezyLiv app on Windows PC is simple and straightforward. Once installed, you’ll be able to enhance your surveillance experience, making it more convenient to monitor multiple devices, stay informed with push notifications, and communicate effectively with the two-way audio feature.
By following this guide, you can get started with ezyLiv on your Windows PC today and take full advantage of all the benefits it offers for your remote monitoring needs.
Trending Now
Updates